Step-by-Step Guide: Deploying a React-Node.js Application on Amazon EC2
This is a quick tutorial to show how to deploy a dockerized web app on an AWS EC2 instance.
Here is a link to our GitLab where you can find all the code used in this tutorial.
Prerequisites:
AWS account
Docker Hub Account
Basic Docker knowledge and experience
Basic Linux knowledge and experience
Basic SSH and networking knowledge and experience
Objectives:
Create and configure an AWS EC2 instance.
Install Docker on the EC2 instance.
Fetch an image from a private Docker repository on Docker Hub.
Start a Docker container using the fetched image on the EC2 instance.
Configure external access to the application from a web browser.
Access the App
1-Create an AWS EC2 instance.
Amazon EC2 (Elastic Compute Cloud) is a web service provided by Amazon Web Services (AWS) that offers scalable computing capacity in the cloud. It allows users to rent virtual servers, known as instances, to run applications and services. So as a simple use case, we're going to deploy a web application on ec2 instance.
Launch an EC2 Instance:
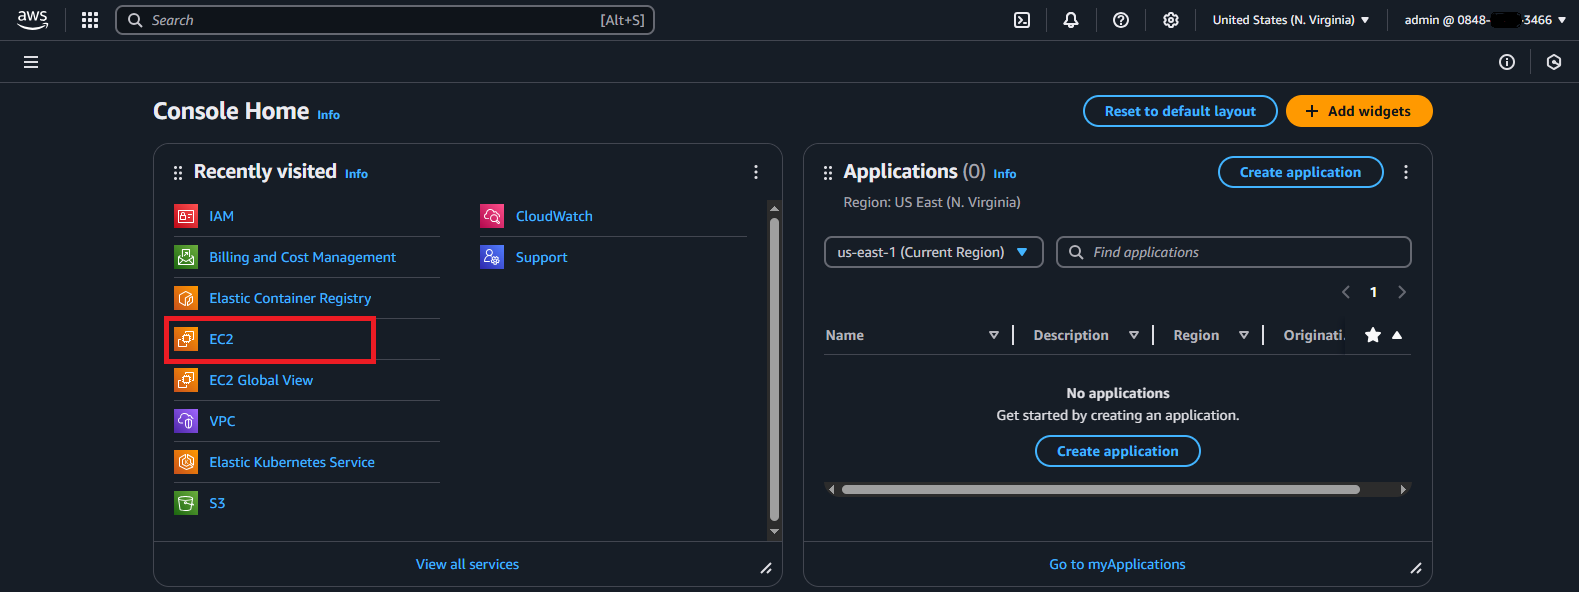
Go to the AWS Management Console.
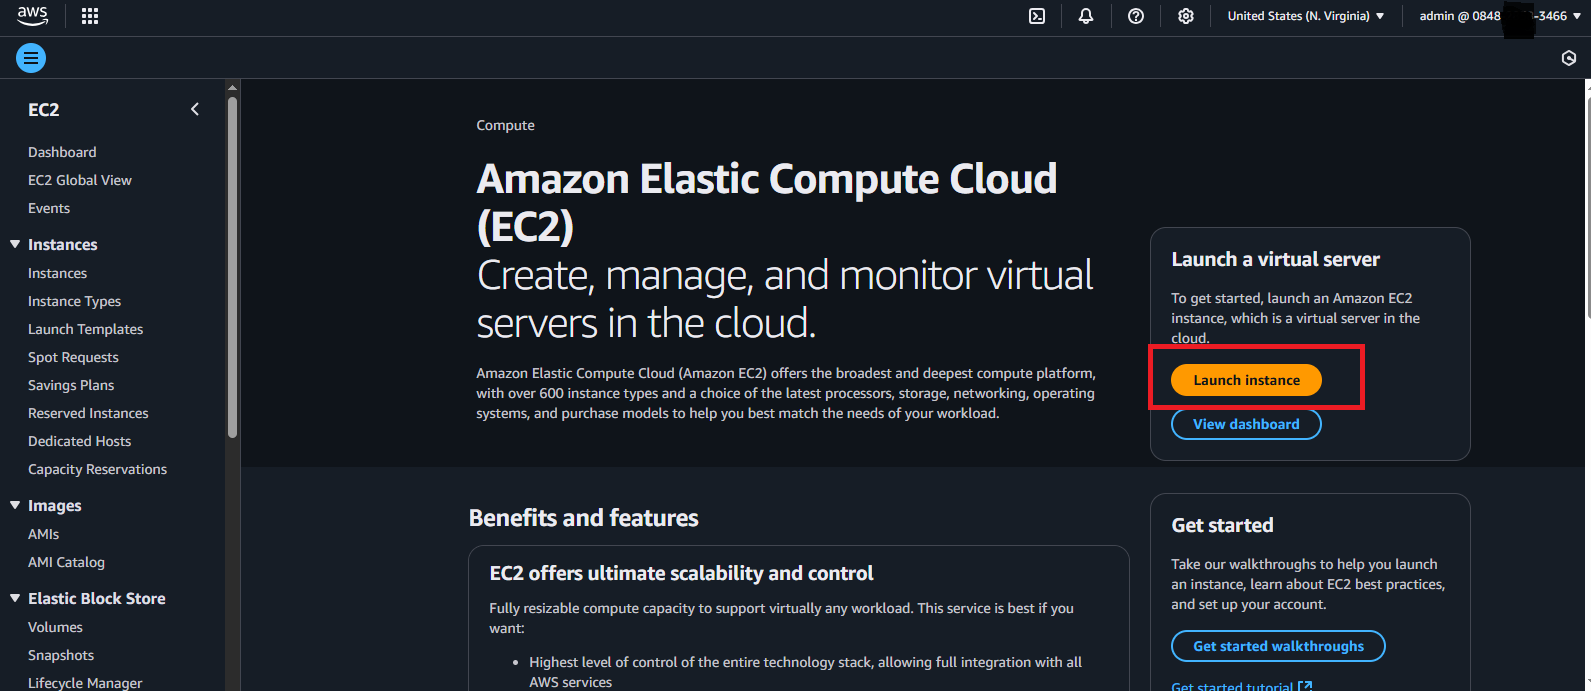
Navigate to EC2 > Instances > Launch Instance.
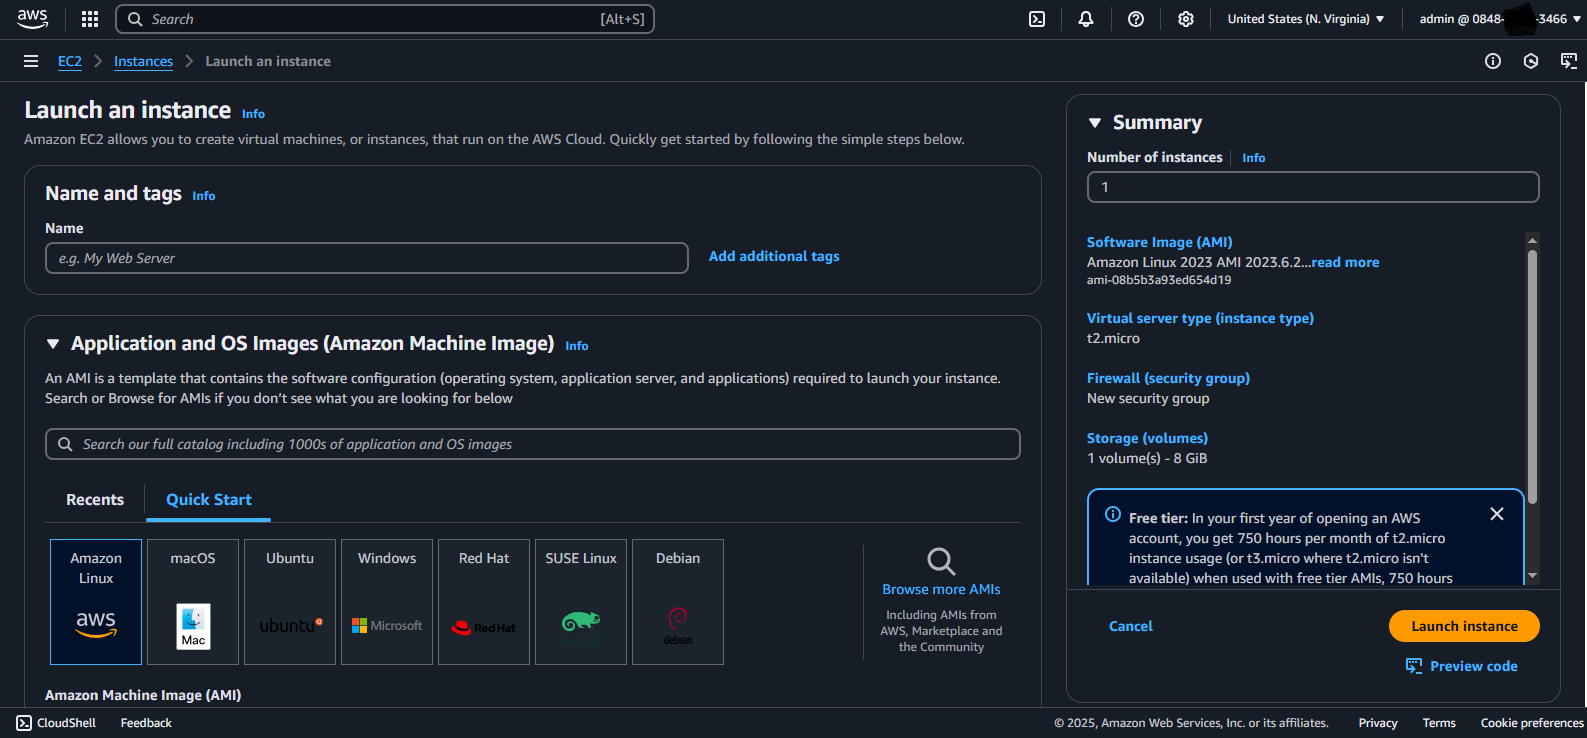
At this point, you can add a name and optionally a tag to your EC2 instance to help identify and manage it more easily. Since your EC2 instance named my-instance is hosting Docker, tagging it with server-with-docker is a useful way to categorize and identify its purpose.
Choosing the right Amazon Machine Image (AMI) is crucial for the successful deployment and operation of your application on an EC2 instance. By carefully evaluating factors such as the operating system, pre-installed software, security updates, community support, cost, and customization needs, you can select an AMI that aligns with your technical requirements and operational goals.
For our demo, selecting the Amazon Linux 2023 AMI , t2.micro that is free tier eligible is an excellent choice.
Key Pair (Login):
A key pair in AWS is a set of security credentials used to securely connect to your EC2 instances. It consists of a public key and a private key:
Public Key:
- The public key is stored by AWS and is associated with your EC2 instance. It is used to encrypt data sent to the instance.
Private Key:
- The private key is downloaded and kept by you. It is used to decrypt data sent from the instance and to securely connect to the instance via SSH.
Select the private key file format:
Choose
.pemif you are using a Mac or Linux system, as it is compatible with the OpenSSH tool used for SSH connections.Choose
.ppkif you are using a Windows system, as it is compatible with PuTTY, a tool used for SSH connections on Windows.
RSA and ED25519 are two different types of cryptographic algorithms used for generating key pairs in SSH and other security protocols.
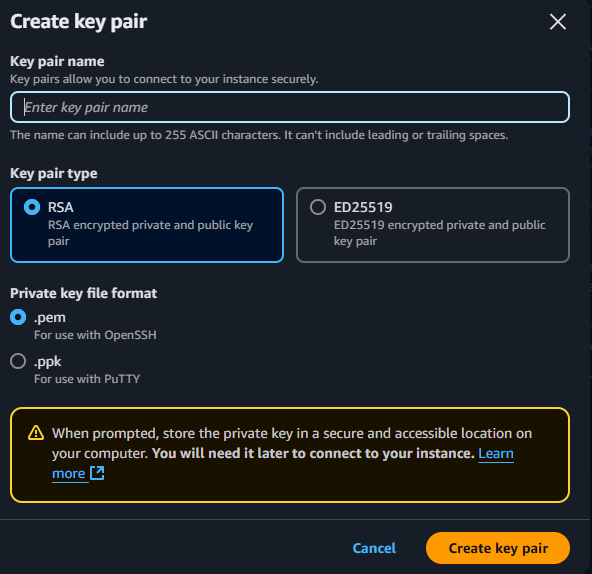
We named the key docker-server and since you are on a Linux system, have chosen RSA as the cryptographic algorithm, selecting the .pem format for your private key is the appropriate choice.

After downloading the key, you can move it to the .ssh directory on your PC to keep it organized and easily accessible for SSH connections.
Configuring network settings:
When configuring network settings for your EC2 instance, consider the following key aspects:
VPC (Virtual Private Cloud):
- Ensure your instance is launched within a VPC. This provides a secure and isolated network environment. We will use the default one.
Subnet:
- help organize and secure your network by controlling access and traffic flow between different parts of your infrastructure.
Security Groups:
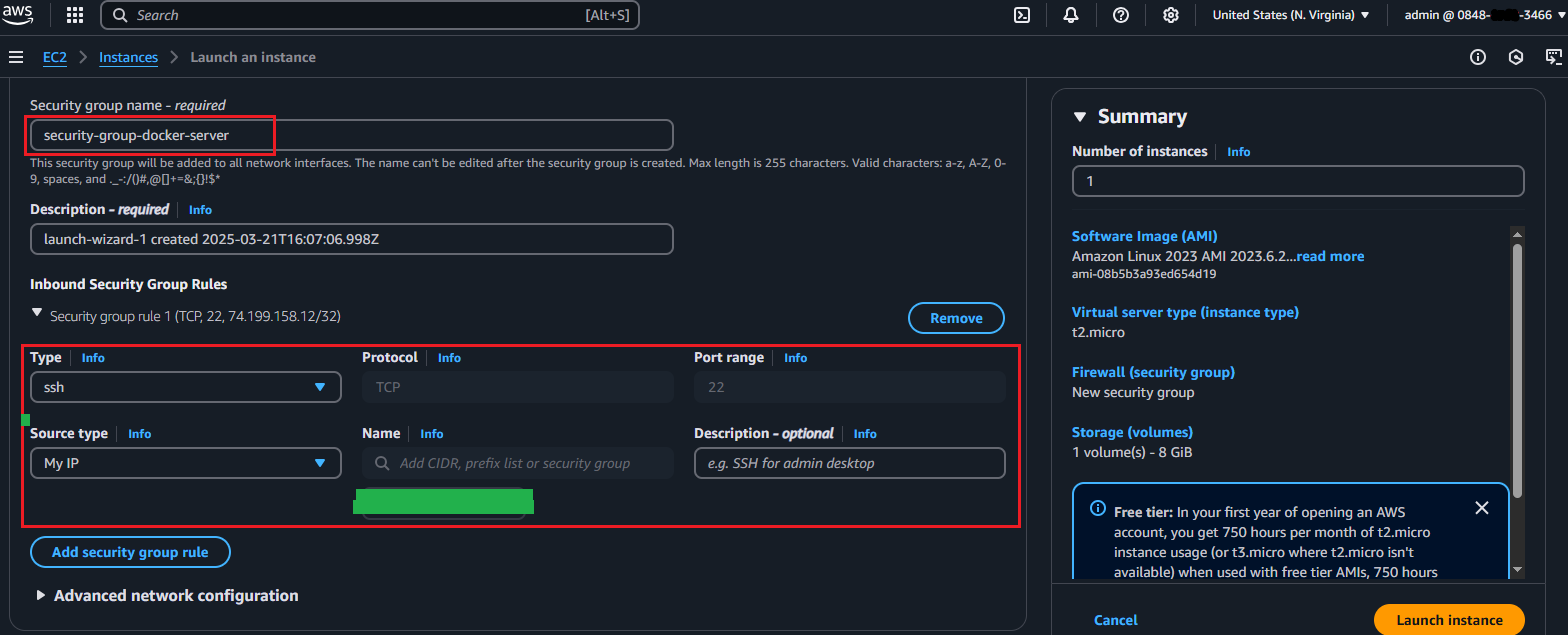
When configuring firewall rules for your instance through a Security Group in AWS, you can define both inbound and outbound rules. Inbound rules control the incoming traffic to your instance, while outbound rules manage the outgoing traffic. Define rules to allow necessary traffic, such as SSH (port 22) for management or HTTP/HTTPS (ports 80/443) for web applications
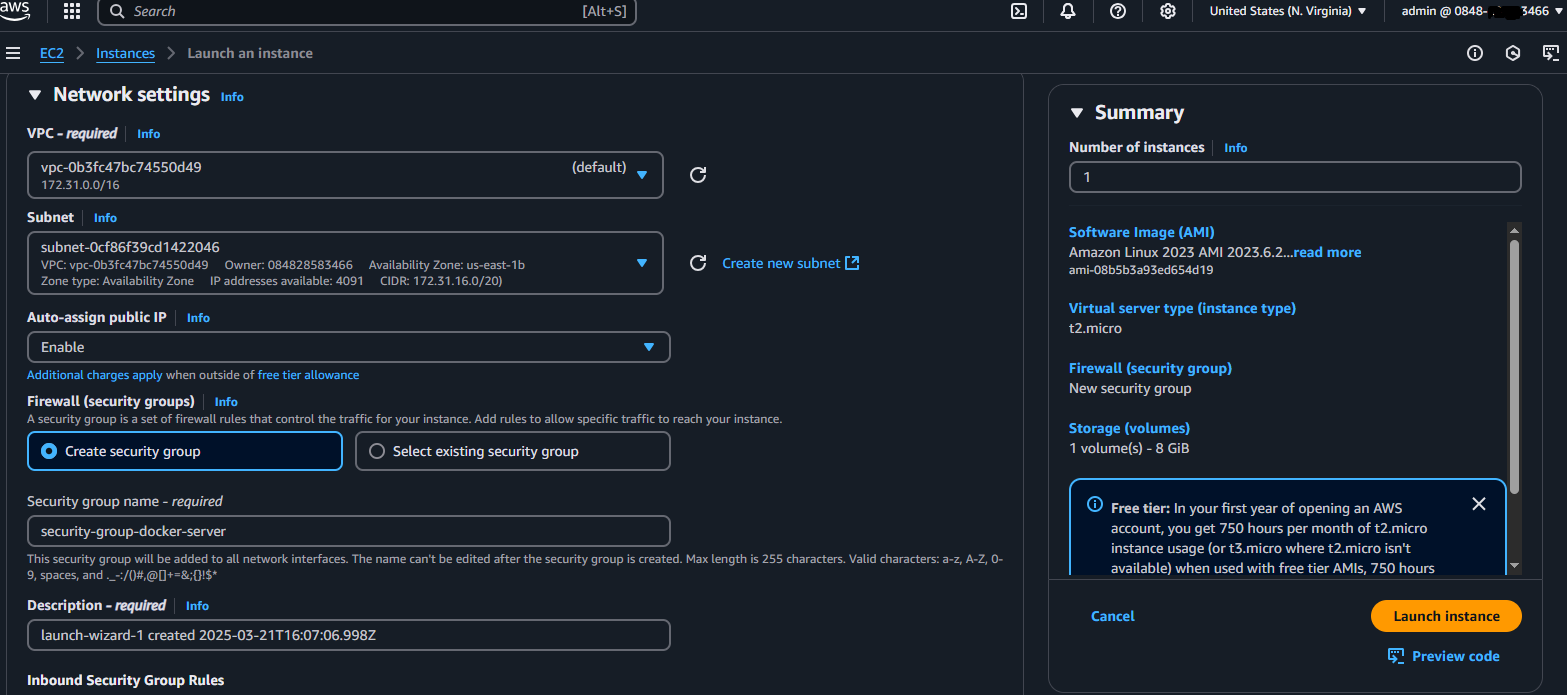
The
Auto-assign Public IPfeature allows you to automatically assign a public IP address to an instance when it is launched in a subnet that is configured to support public IP addresses. This is particularly useful for instances that need to communicate with the internet directly.setting the source type to
My IPallows you to create a rule that permits traffic from your current public IP address. This is useful for securing access to your instances by ensuring that only your specific IP address can connect to them.
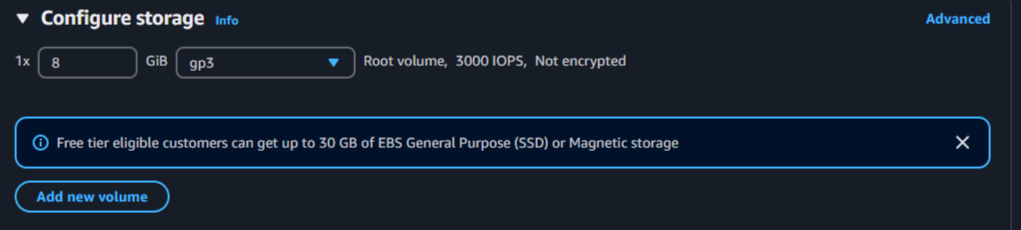
Configuring storage for an EC2 instance involves setting up and managing the storage volumes attached to your instance. we’ll chose
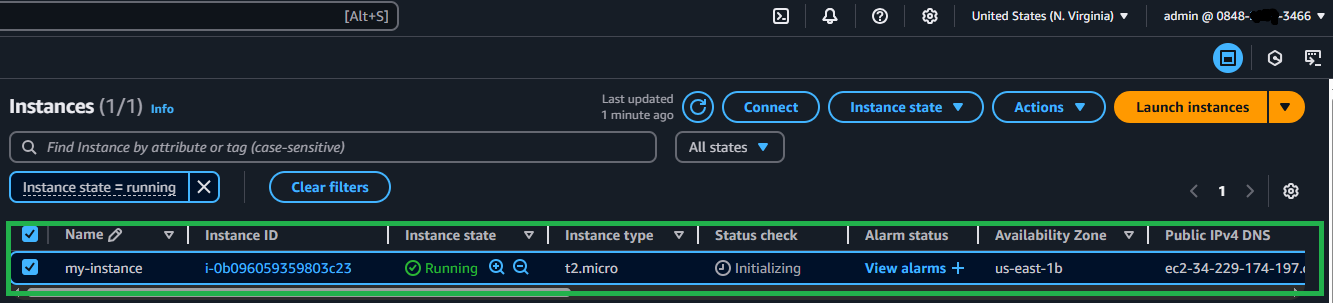
Our instance is ready to be launched.

Returning to the instances dashboard, we have:
2-Install Docker on the EC2 instance
Since we downloaded the key and moved it to the .ssh directory on your PC, it is now organized and easily accessible for SSH connections.

We ensure the correct permissions are set for the .pem file by using the command chmod 400 your-key-name.pem to maintain security.

What chmod 400 does:
4: Grants read permission to the owner of the file.
0: Denies all permissions (read, write, execute) to the group.
0: Denies all permissions (read, write, execute) to others.
We can now SSH into the EC2 instance. So, we will need the public DNS or IP address of your instance.
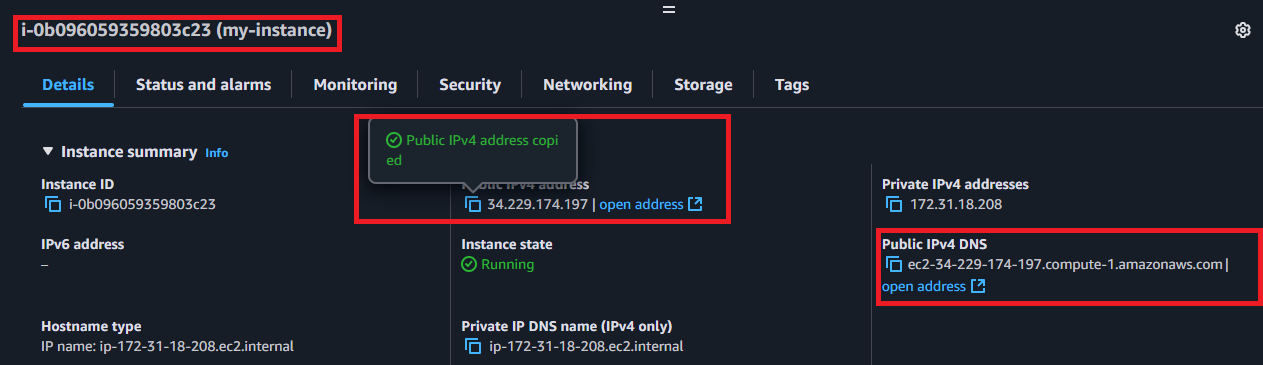
The command :
ssh -i your-key-name.pem ec2-user@your-instance-public-ipis used to connect to an Amazon EC2 instance using SSH with the instance's public IP address ,ssh -i your-key-name.pem ec2-user@your-instance-public-dnsIf we use the DNS.
Command Breakdown
ssh: The Secure Shell (SSH) command used to connect to a remote server.-i your-key-name.pem: Specifies the private key file (your-key-name.pem) for authentication. This key is the one we downloaded when you created the EC2 instance.ec2-user: The default username for Amazon Linux and Amazon Linux 2 AMIs. For other AMIs, the username may differ:Ubuntu:
ubuntuCentOS:
centosDebian:
adminRed Hat:
ec2-user
your-instance-public-dns: The public DNS name or public IP address of your EC2 instance. You can find this in the EC2 Management Console under the Public IPv4 DNS or Public IPv4 address field.
In our case, we will use the IP address:

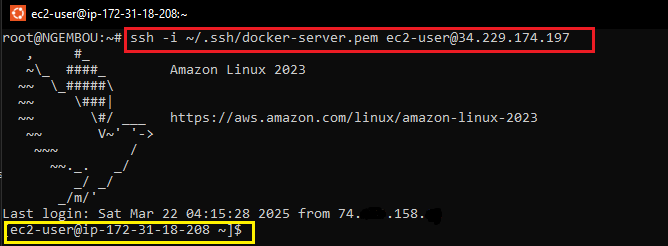
In ec2-user@ip-172-31-18-208, 172-31-18-208 represents the private IP of our EC2 instance.
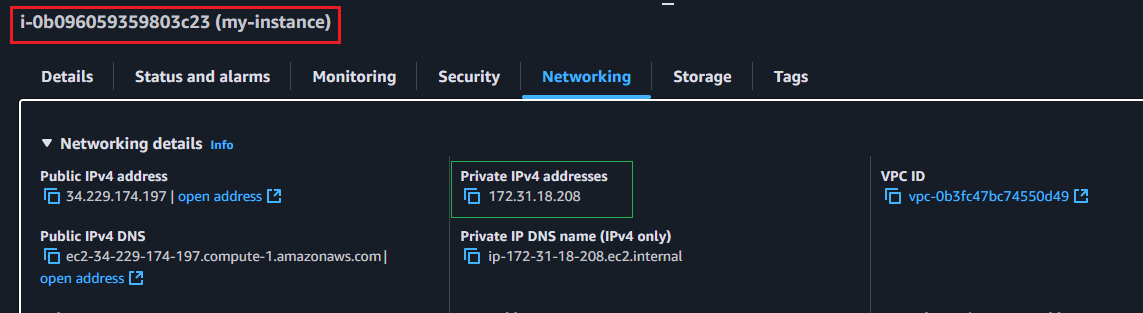
After connecting with SSH, check the package manager and always update it. This is useful for keeping the repositories up-to-date. Since we are using an Amazon AMI, we use yum.
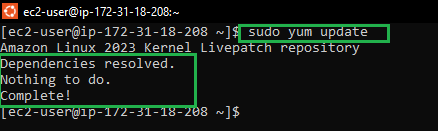
Now we can run sudo yum install docker to install Docker. After installation, verify it's installed correctly by using docker --version . Next, we start the Docker daemon with sudo service docker start and check if it's running.

We want to run Docker commands without using sudo. To do this, we need to add ec2-user to the Docker group by using the command: sudo usermod -aG docker $USER.
After running this command, it's important to log out and log back in for the changes to take effect.

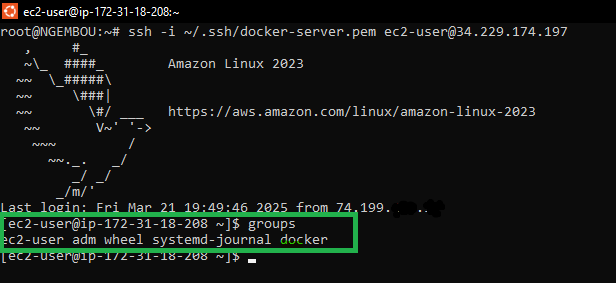
3-Fetch an image from a private Docker repository on Docker Hub
First, we'll build and tag our image locally and push it to our Docker Hub repository.
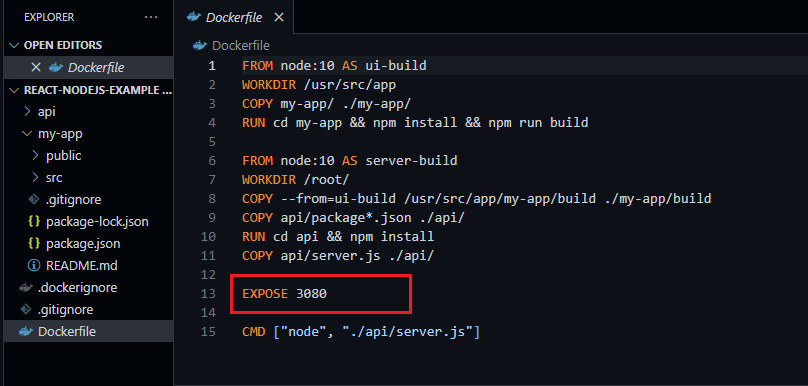
This is our Dockerfile, and the app starts at port 3080 inside the Docker container.
To build the docker image, we use the command : docker build -t legrabg7/demo:1.0 .
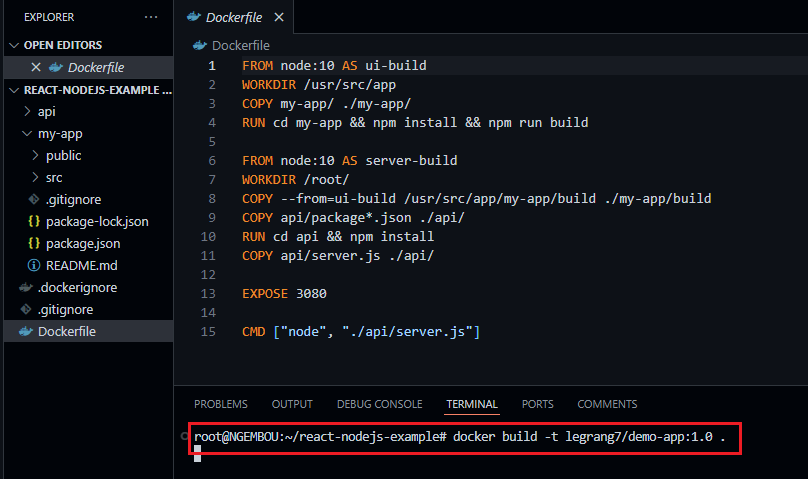
Command Breakdown
docker build: The command to build a Docker image.-t legrabg7/demo:1.0: Tags the image with a name (legrabg7/demo) and a version (1.0).legrabg7/demo: The name of the image, typically in the format<username>/<repository>.1.0: The tag or version of the image.
.: Specifies the build context (the directory containing the Dockerfile and any other files needed for the build).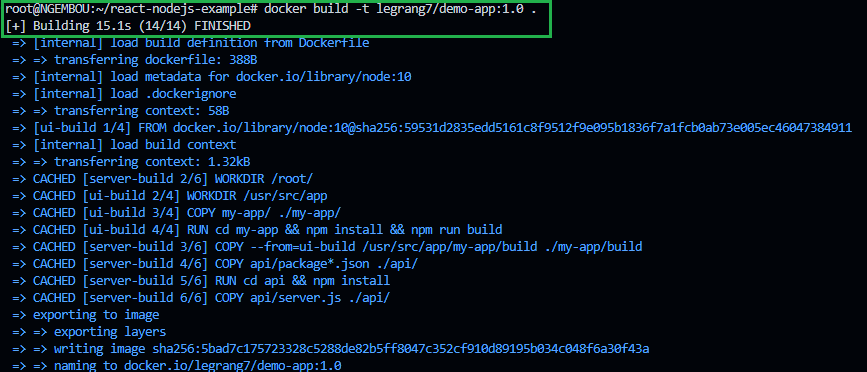
Using the command
docker images, you can view a list of all the Docker images available on your system.
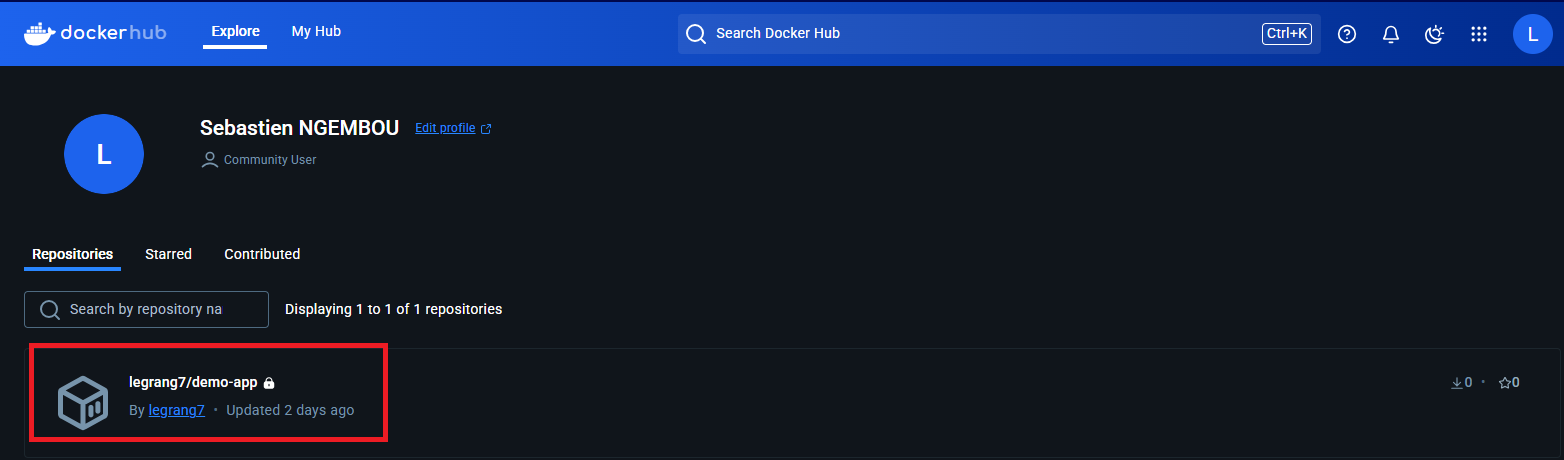
Now, we need to push this image to our private Docker Hub repository. To do this, we must first log in to Docker Hub via the CLI using the command
docker login -u username.Command Breakdown
docker login: The command to authenticate with a Docker registry.-u username: Specifies your Docker Hub or registry username.-p password: (Optional) Specifies your password. If not provided, Docker will prompt you for it interactively.

And we push the imge : dokcer push legrabg7/demo:1.0
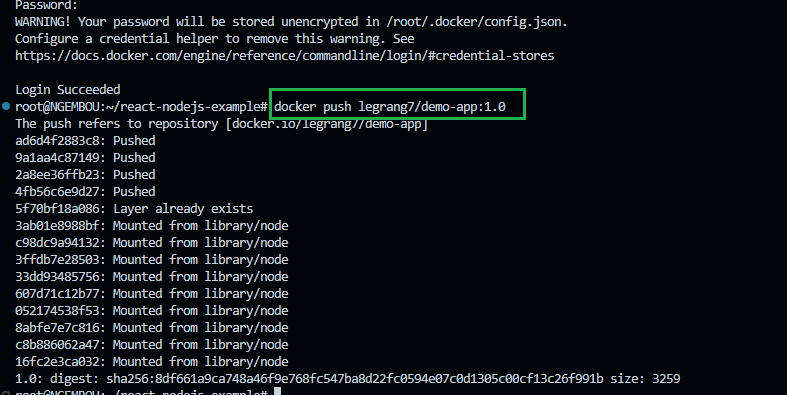
We check the repository to see if the image has been uploaded.
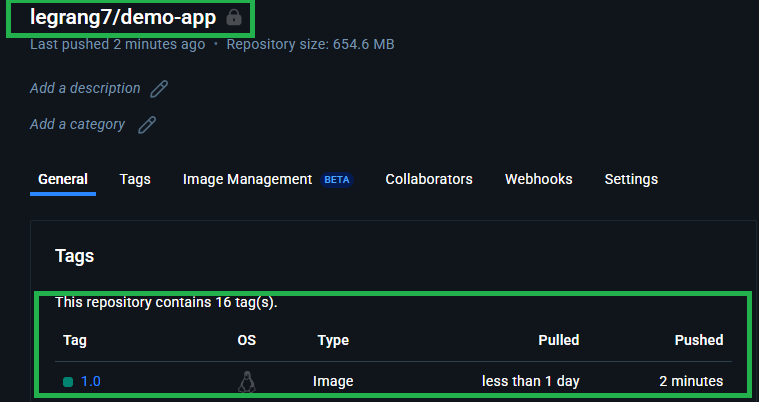
4-Start a Docker container using the fetched image on the EC2 instance
The next step is to SSH into our EC2 instance, log in to our private Docker Hub, and pull the image from that Docker repository.
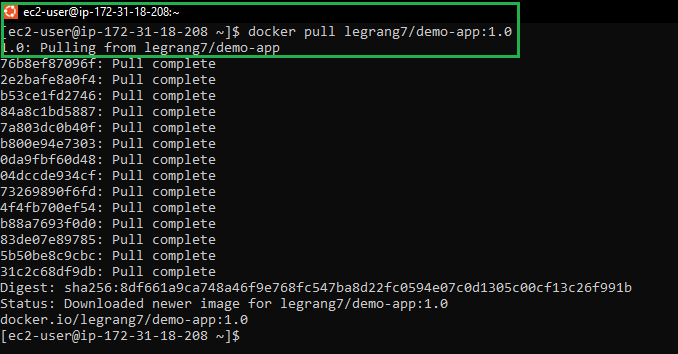
Now, run our image using the command: docker run -d -p 3000:3080 legrang7/demo-app:1.0.

docker run: The command to create and start a container from an image.-d: Runs the container in detached mode (in the background).-p 3000:3080: Maps port3080inside the container to port3000on the host machine(ec2).3000: The port on the host machine.3080: The port inside the container.
With docker ps command, we can see our running container:

5-Configure external access to the application from a web browser
The application starts inside the container on port 3080, and we make it accessible on the EC2 instance through port 3000. This setup means that when you access the EC2 instance on port 3000, the traffic is directed to port 3080 inside the container, allowing you to interact with the application.
We have a security group attached with configured firewall rules. Currently, only port 22 is open on the server. We need to open port 3000 as well, so requests from the browser can reach our instance on port 3000.
Step 1: Identify the Security Group
Go to the AWS Management Console > EC2 > Instances.
Select your EC2 instance.
In the Description tab, locate the Security groups section. Note the name of the security group (e.g.,
launch-wizard-1).
Step 2: Edit Inbound Rules
Go to EC2 > Security Groups in the left-hand menu.
Select the security group associated with your instance.
Click on the Inbound rules tab.
Click Edit inbound rules.
Step 3: Add Inbound Rules
Click Add rule to create a new rule.
Configure the rule based on the type of traffic you want to allow:
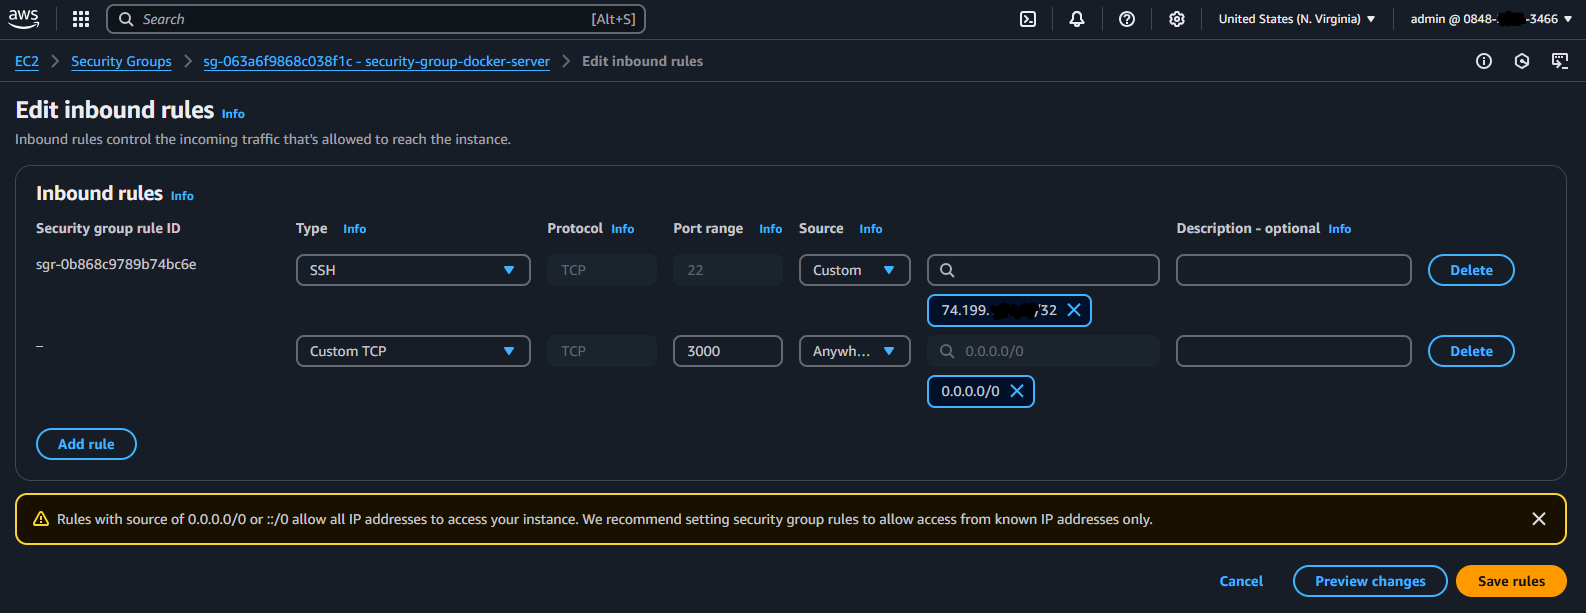
In our case, we want to allow anyone, anywhere (0.0.0.0/0) to access port 3000.
6-Access the App from the Browser
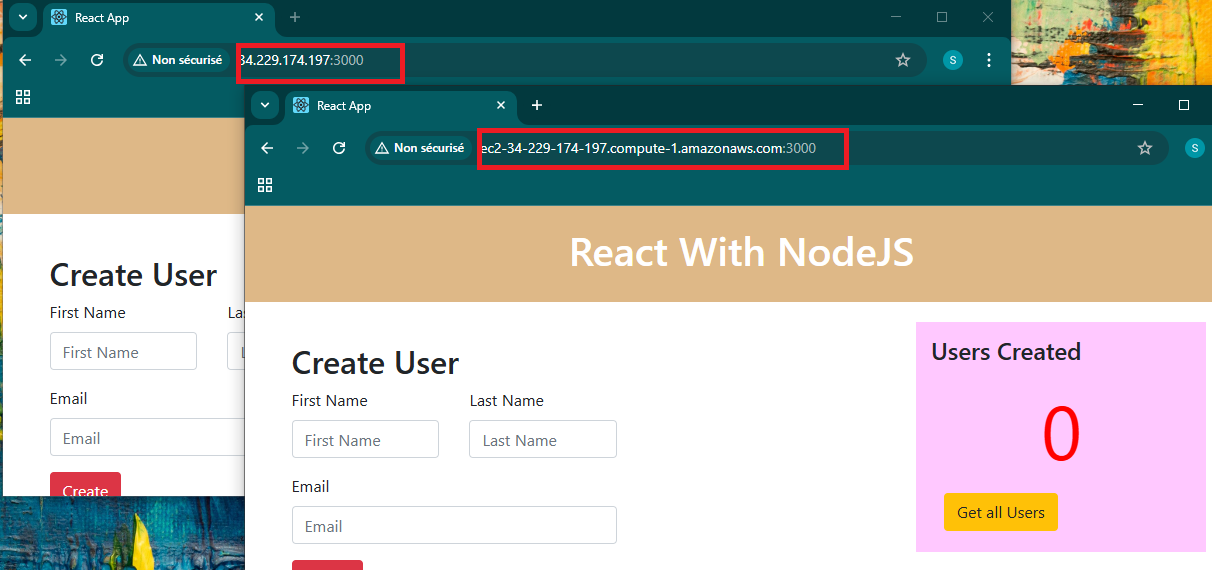
Finally, because this application has a user interface, We can access it through the browser by using either the public IP or the DNS and port 3000.
Conclusion
To wrap up, we have successfully created an EC2 instance and installed Docker on it. We then fetched an image from a private Docker repository on Docker Hub and started a Docker container on the instance. Finally, we configured external access from a web browser to the application running on the EC2 instance.
Thank you so much for following along with this tutorial. Stay tuned for more tutorials on DevOps concepts.

